What Are Microgreens?
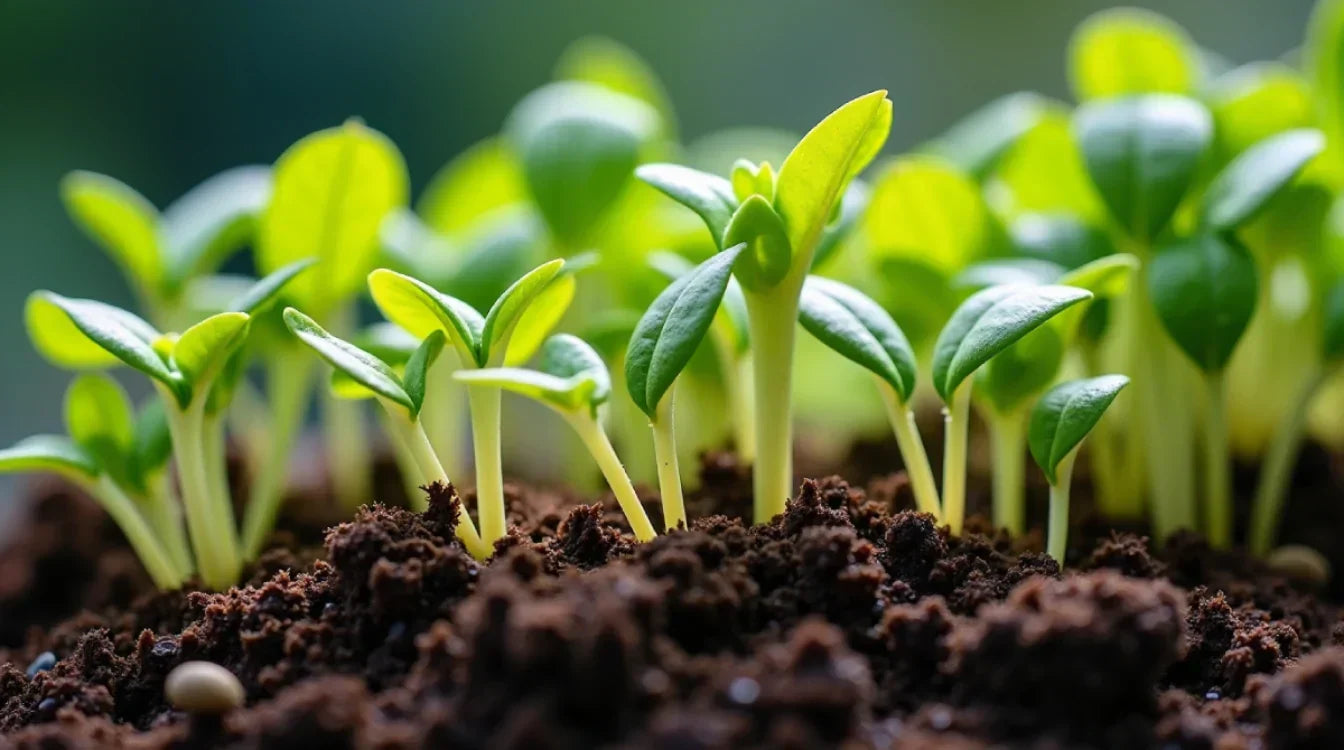
Microgreens represent the perfect intersection of convenience, nutrition, and flavor in the plant world. These young vegetable greens are harvested just 7-21 days after germination when they've developed their first true leaves. Not to be confused with sprouts (germinated seeds eaten root, seed, and shoot) or baby greens (harvested later in development), microgreens occupy a unique place in the plant growth cycle where they've been proven to contain up to 40 times the nutritional value of their mature counterparts.
The journey of growing microgreens begins with proper seeding—the foundation upon which successful microgreen cultivation is built. With minimal space requirements and quick turnaround times, microgreens offer an accessible entry point to indoor gardening while providing exceptional nutritional benefits and culinary versatility.
Popular varieties of microgreens include:
- Brassicas (broccoli, cabbage, radish, mustard)
- Amaranthaceae family (amaranth, quinoa, spinach, beet, chard)
- Apiaceae family (carrot, dill, fennel)
- Asteraceae family (lettuce, endive, radicchio)
- Legumes (pea, sunflower, chickpea)
- Grains (corn, wheat, oats, barley)
Each variety offers distinct flavors, textures, colors, and nutritional profiles, making microgreens a diverse category that rewards experimentation.

Benefits of Growing Your Own Microgreens
Nutritional Powerhouses
The concentrated nutrition in microgreens makes them particularly valuable:
- Significantly higher levels of vitamins (C, E, K) compared to mature plants
- Rich sources of antioxidants and polyphenols
- Contain minerals like potassium, iron, zinc, and magnesium
- High in protein compared to many vegetables
- Abundant in health-promoting enzymes
- Excellent source of dietary fiber
Economic Advantages
Growing your own microgreens presents several economic benefits:
- Substantial cost savings compared to store-bought microgreens
- Quick harvest cycle allows for continuous production
- Small space requirements make them accessible for any living situation
- Minimal equipment needed to get started
- Potential for scaling into a small business opportunity
- Reduces packaging waste from store-bought greens
Environmental Impact
The sustainable nature of microgreen production includes:
- Minimal water usage compared to conventional agriculture
- No pesticides or herbicides necessary
- Can be grown in repurposed containers
- Zero transportation footprint when grown at home
- Year-round growing capability reduces seasonal dependencies
- Minimal carbon footprint compared to store-bought produce

Essential Equipment for Seeding Microgreens
Growing Containers
The foundation of microgreen growing begins with the right containers:
- Shallow trays: 1-2 inches deep is ideal for most microgreens
- Drainage considerations: Holes or a two-tray system for proper drainage
- Size options: Standard 10x20-inch nursery flats or smaller household containers
- Material choices: Food-grade plastic, terracotta, glass, or stainless steel
- Repurposed containers: Clamshell packages, take-out containers with drainage added
- Specialized microgreen trays: Purpose-built with optimal depth and drainage
Growing Medium Options
Several substrate options work well for microgreens:
- Soil mixes: Organic seed-starting mix or potting soil
- Soilless media: Coco coir, peat moss, or vermiculite blends
- Hemp mats: Biodegradable growing mats made specifically for microgreens
- Jute mats: Natural fiber mats that provide excellent water retention
- Paper towel method: Simple starter option for beginners
- Hydroponic options: Growing mats combined with nutrient solution
Seeding Tools
Specialized tools make the seeding process more efficient:
- Seed shakers: For even distribution of small seeds
- Measuring scoops: For consistent seeding density
- Seed calculators: Tools for determining optimal seed quantity by tray size
- Spray bottles: For gentle watering of newly seeded trays
- Seed storage containers: For maintaining seed viability
- Labels and markers: For tracking varieties and seeding dates
Optional Advanced Equipment
For those looking to scale up or optimize production:
- Grow lights: LED, fluorescent, or specialized plant lights
- Heating mats: For optimal germination temperatures
- Humidity domes: Clear covers that maintain moisture during germination
- Watering systems: Bottom-watering trays or automated irrigation
- Fans: For air circulation to prevent mold issues
- Harvesting tools: Specialized scissors or knives for efficient cutting
Selecting Seeds for Microgreens
Quality Considerations
Not all seeds are created equal when it comes to microgreen production:
- Untreated seeds: Always use untreated seeds (no fungicides or pesticides)
- Organic certification: Ensures no chemical treatments or genetic modifications
- Germination rate: Higher rates (>90%) ensure dense growth
- Seed age: Fresher seeds generally perform better
- Supplier reputation: Purchase from reputable suppliers specializing in microgreens
- Storage history: Properly stored seeds maintain viability longer
Popular Beginner-Friendly Varieties
Some microgreens are easier to grow and more forgiving for beginners:
- Pea shoots: Fast-growing with high yields and mild, sweet flavor
- Sunflower: Vigorous growers with nutty, crunchy texture
- Radish: Quick to germinate with spicy flavor and vibrant color
- Broccoli: Reliable germination with mild broccoli flavor and excellent nutrition
- Mustard: Fast-growing with spicy kick
- Cilantro: Aromatic with distinctive flavor profile
Seed Density Guidelines
Proper seeding density varies by variety:
- Small seeds (broccoli, kale, amaranth): 1-1.5 tablespoons per 10x20 tray
- Medium seeds (radish, basil, beet): 2-3 tablespoons per 10x20 tray
- Large seeds (pea, sunflower, buckwheat): 1-1.5 cups per 10x20 tray
- Overseeding issues: Too dense planting leads to poor air circulation and mold problems
- Underseeding problems: Too sparse planting reduces yield and economic efficiency
- Visual density guide: Seeds should be close but generally not overlapping multiple layers
Step-by-Step Seeding Process
Preparation Phase
Proper preparation sets the stage for successful microgreen production:
- Clean equipment: Sanitize all growing containers and tools
- Prepare growing medium: Moisten soil or growing mat before adding to container
- Level the medium: Create a flat, even surface for uniform seed contact
- Pre-soak larger seeds: Soak peas, sunflower, etc. for 8-12 hours before seeding
- Organize workspace: Arrange all necessary materials before beginning
- Label containers: Note variety and seeding date
Seeding Techniques
Different seed types may require specific approaches:
Small Seed Method
- Evenly distribute seeds across the growing medium surface
- Use a seed shaker or small spoon for controlled distribution
- Avoid clumping by seeding in multiple passes across the tray
- Gently press seeds into contact with growing medium
- Mist lightly with water to settle seeds into place
- No covering with soil necessary for most small-seeded varieties
Large Seed Method
- Distribute pre-soaked seeds evenly across growing medium
- Ensure seeds form a single layer with minimal overlapping
- Press firmly into growing medium to establish good contact
- Consider covering with a thin layer of soil or another tray
- Water gently to avoid displacing seeds
- Apply slight weight during germination phase if needed
Post-Seeding Care
The critical first few days after seeding require attention to:
- Moisture management: Keep growing medium consistently moist
- Light exposure: Most varieties need darkness during germination
- Temperature control: Maintain 65-75°F (18-24°C) for optimal germination
- Humidity levels: Use dome lids to maintain high humidity initially
- Stack weighting: For certain varieties, placing weight atop trays improves rooting
- Daily monitoring: Check moisture levels and emerging shoots
The Blackout Period
Purpose and Benefits
The blackout phase serves several important functions:
- Encourages root development: Darkness promotes downward growth
- Creates stronger stems: Plants stretch upward seeking light
- Establishes uniformity: Even coverage and growth across the tray
- Improves yields: Stronger foundation leads to better overall production
- Enhances flavor: Properly managed blackout affects flavor development
- Reduces mold risk: Controlled environment during vulnerable early stage
Duration Guidelines
Blackout periods vary by crop:
- Fast-germinating varieties (radish, broccoli): 2-3 days
- Medium-term varieties (mustard, arugula): 3-4 days
- Slower varieties (beet, chard): 4-5 days
- Large seeds (pea, sunflower): 3-4 days after sprouting begins
- Visual indicators: Roots established in growing medium and cotyledons developing
- Height considerations: 1-2 inches tall for many varieties before introducing light
Stacking Technique
Some growers use weight during the blackout period:
- Method: Place another tray directly on seeds with modest weight
- Benefits: Encourages stronger root development and uniform growth
- Duration: Typically 2-3 days depending on variety
- Transition: Remove weight when seedlings begin lifting the tray
- Applicable varieties: Works well for larger-seeded varieties like peas and sunflower
- Cautions: Monitor closely to prevent damaging emerging seedlings
Introducing Light After Germination
Lighting Options
Once seedlings emerge, light becomes critical:
- Natural sunlight: South-facing windows provide good results (northern hemisphere)
- Fluorescent lights: T5 or T8 tubes positioned 2-4 inches above plants
- LED grow lights: Energy-efficient with customizable spectrum options
- Light duration: 12-16 hours daily recommended
- Light intensity: 20-30 watts per square foot for optimal growth
- Light distance: Adjust height as plants grow to prevent stretching or burning
Light Exposure Transition
Transitioning from darkness to light requires care:
- Gradual introduction: Consider partial exposure initially
- Monitor response: Watch for signs of stress like wilting
- Adjust light height: Begin higher and lower as plants acclimate
- Humidity management: Maintain higher humidity during transition
- Temperature control: Avoid heat stress from lights
- Watering adjustment: Light exposure increases water requirements
Watering Techniques for Microgreens
Watering Methods
Proper hydration without disturbing delicate seedlings includes:
- Bottom watering: Adding water to tray underneath growing container
- Misting: Gentle spray for surface moisture without disturbing seeds
- Irrigation systems: Automated solutions for consistent moisture
- Capillary mats: Self-watering method for consistent moisture
- Watering cans with fine rose attachments: For gentle top watering
- Scheduled approach: Regular, smaller waterings rather than infrequent drenching
Common Watering Mistakes
Avoid these pitfalls for healthier microgreens:
- Overwatering: Leads to mold, root rot, and fungal diseases
- Underwatering: Causes stunted growth and reduced yields
- Inconsistent watering: Results in uneven growth across the tray
- Poor drainage: Creates waterlogged conditions harmful to roots
- Cold water shock: Using very cold water can slow growth
- Watering late in day: Leaves moisture overnight, increasing mold risk

Monitoring Growth and Development
Growth Stages
Understanding the progression of microgreen development:
- Germination: Seeds swell, split, and emerge (2-3 days)
- Cotyledon stage: First seed leaves appear (3-5 days)
- True leaf development: First true leaves begin forming (7-10 days)
- Harvest stage: Optimal size and nutritional value (7-21 days)
- Post-optimal stage: Quality and flavor may decline (beyond 21 days)
- Specific variety timelines: Each type has ideal harvest windows
Common Problems and Solutions
Watch for these issues during the growing cycle:
Mold and Fungus
- Symptoms: White, fuzzy growth on seeds or medium
- Causes: Excessive moisture, poor air circulation, contaminated materials
- Solutions: Increase airflow, reduce watering, adjust seed density, hydrogen peroxide rinse
Leggy Growth
- Symptoms: Excessively tall, weak stems
- Causes: Insufficient light, light too distant from plants
- Solutions: Increase light intensity, move lights closer, adjust temperature
Uneven Growth
- Symptoms: Patches of different heights or development
- Causes: Uneven seeding, watering, or light exposure
- Solutions: Improve seeding technique, rotate trays, ensure even moisture
Yellowing
- Symptoms: Cotyledons turning yellow prematurely
- Causes: Nutrient deficiency, overwatering, end of life cycle
- Solutions: Harvest promptly, adjust watering, consider light nutrient solution
Harvesting and Storage
Optimal Harvest Timing
Determining the perfect moment to harvest:
- Visual indicators: First true leaves developed, cotyledons fully expanded
- Height guidelines: Typically 2-4 inches depending on variety
- Color intensity: Vibrant color indicates peak nutritional value
- Taste testing: Flavor reaches optimal balance
- Variety-specific timing: Range from 7 days (radish) to 21+ days (slower varieties)
- Morning harvest: Typically provides best flavor and shelf life
Harvesting Techniques
Methods for clean, efficient harvesting:
- Sharp scissors: Clean cut just above soil line
- Serrated knife: For tougher stems like pea shoots and sunflower
- Electric trimmer: For commercial-scale production
- Harvesting board: Provides backing support during cutting
- Single cut method: Complete tray harvested at once
- Progressive harvest: Multiple cuttings from the same tray for some varieties
Storage Best Practices
Maximizing shelf life after harvest:
- Initial drying: Allow surface moisture to evaporate before storage
- Container options: Sealed glass containers, plastic bags with paper towels
- Temperature control: Store at 35-40°F (2-4°C) for maximum freshness
- Moisture management: Avoid washing before storage if possible
- Typical shelf life: 5-7 days under optimal conditions
- Freezing option: Some varieties can be frozen for smoothies or cooked applications
Advanced Seeding Techniques
Succession Planting
Creating continuous harvests through staggered seeding:
- Planning calendar: Schedule new trays every 3-7 days
- Production calculation: Determine weekly consumption needs
- Record keeping: Track germination and harvest dates by variety
- Space management: Rotate growing area for continuous production
- Seasonal adjustments: Account for temperature variations affecting growth rates
- Variety rotation: Alternate between quick and slow-growing varieties
Multi-Variety Trays
Growing multiple varieties in a single container:
- Compatible combinations: Pair varieties with similar growth rates
- Sectional dividers: Create separate growing areas within one tray
- Staggered seeding: Add faster-growing varieties days after slower ones
- Harvest considerations: Varieties must reach optimal harvest simultaneously
- Visual appeal: Create attractive color and texture combinations
- Flavor profiles: Combine complementary tastes for culinary applications
Pre-Treatment Methods
Techniques to improve germination and growth:
- Seed soaking: Water immersion for large seeds (2-24 hours depending on variety)
- Scarification: Nicking or abrading hard seed coats to improve water absorption
- Stratification: Cold treatment for certain varieties to break dormancy
- Hydrogen peroxide soak: Brief 3% solution soak to disinfect seeds
- Seed priming: Controlled hydration to initiate germination processes
- Hot water treatment: Brief hot water exposure for certain hard-coated seeds
Commercial Production Considerations
Scaling Techniques
Moving from hobby to commercial production:
- Equipment investment: Commercial-grade trays, lighting, and irrigation systems
- Space optimization: Vertical racking systems to maximize growing area
- Workflow efficiency: Establishing standardized processes for each production phase
- Labor management: Identifying labor-intensive steps for potential automation
- Batch tracking: Systems for monitoring multiple growing cycles simultaneously
- Quality control: Consistent protocols for maintaining product standards
Business Opportunities
Market channels for microgreen growers:
- Farmers markets: Direct-to-consumer sales with education opportunity
- Restaurant supply: Partnerships with local chefs and foodservice
- Subscription services: Weekly delivery of fresh microgreens to regular customers
- Retail partnerships: Supplying local grocery stores and food co-ops
- Value-added products: Dried microgreen powders, microgreen pesto, etc.
- Education programs: Workshops and classes on microgreen production
Certification Options
Considerations for commercial growers:
- Organic certification: Meeting USDA or local organic standards
- Food safety protocols: HACCP implementation and documentation
- Good Agricultural Practices (GAP): Certification for safety and quality
- Local regulations: Compliance with regional food production requirements
- Seed sourcing documentation: Maintaining records of seed origins
- Facility requirements: Understanding regulations for commercial growing spaces
Conclusion: The Joy and Value of Seeding Microgreens
Seeding microgreens represents the beginning of a rewarding journey that combines science, art, and nutrition. Whether you're growing for personal consumption, culinary creativity, or commercial opportunity, the process of transforming tiny seeds into nutrient-dense greens offers satisfaction on multiple levels.
The accessibility of microgreen growing makes it an ideal entry point for those interested in food production, regardless of available space or experience. With minimal investment and quick results, seeding microgreens provides nearly immediate gratification while building skills applicable to broader gardening and farming pursuits.
As awareness of nutritional density and food production sustainability continues to grow, microgreens stand at the intersection of these important trends. By mastering the fundamental techniques of seeding microgreens, you open the door to a world of flavor, nutrition, and potential that can expand in whatever direction your interests lead.
Start with a single tray, a handful of seeds, and the information provided in this guide. From that simple beginning, you'll discover why microgreens have captured the attention of chefs, health enthusiasts, and entrepreneurs alike—offering a perfect combination of accessibility, nutrition, and satisfaction that few other food products can match.




Share:
Black Trumpet Mushroom: The Complete Guide to This Extraordinary Culinary Delicacy
Do Mushrooms Need Light to Grow: Understanding the Lighting Requirements for Fungal Cultivation