

Grow Your Own Mushroom Oasis: A Beginner's Guide to Building the Perfect Mushroom Grow Tent
Why Create a Mushroom Grow Tent?
Creating your own mushroom grow tent offers an exciting way to cultivate fresh, organic mushrooms year-round, regardless of your outdoor climate or available space. This controlled environment allows you to grow a variety of mushroom species that might otherwise be challenging or impossible in your natural setting. A proper mushroom grow tent creates the ideal microclimate of humidity, temperature, light, and air exchange that different fungi need to thrive.
For beginners, a mushroom grow tent provides significant advantages over other cultivation methods. It protects growing mushrooms from contaminants like mold spores and bacteria that naturally exist in our homes. It also creates a designated space that can be optimized specifically for mushroom production without disrupting your living areas. Perhaps most importantly, it allows precise control over growing conditions, significantly increasing your chances of success and abundant harvests.

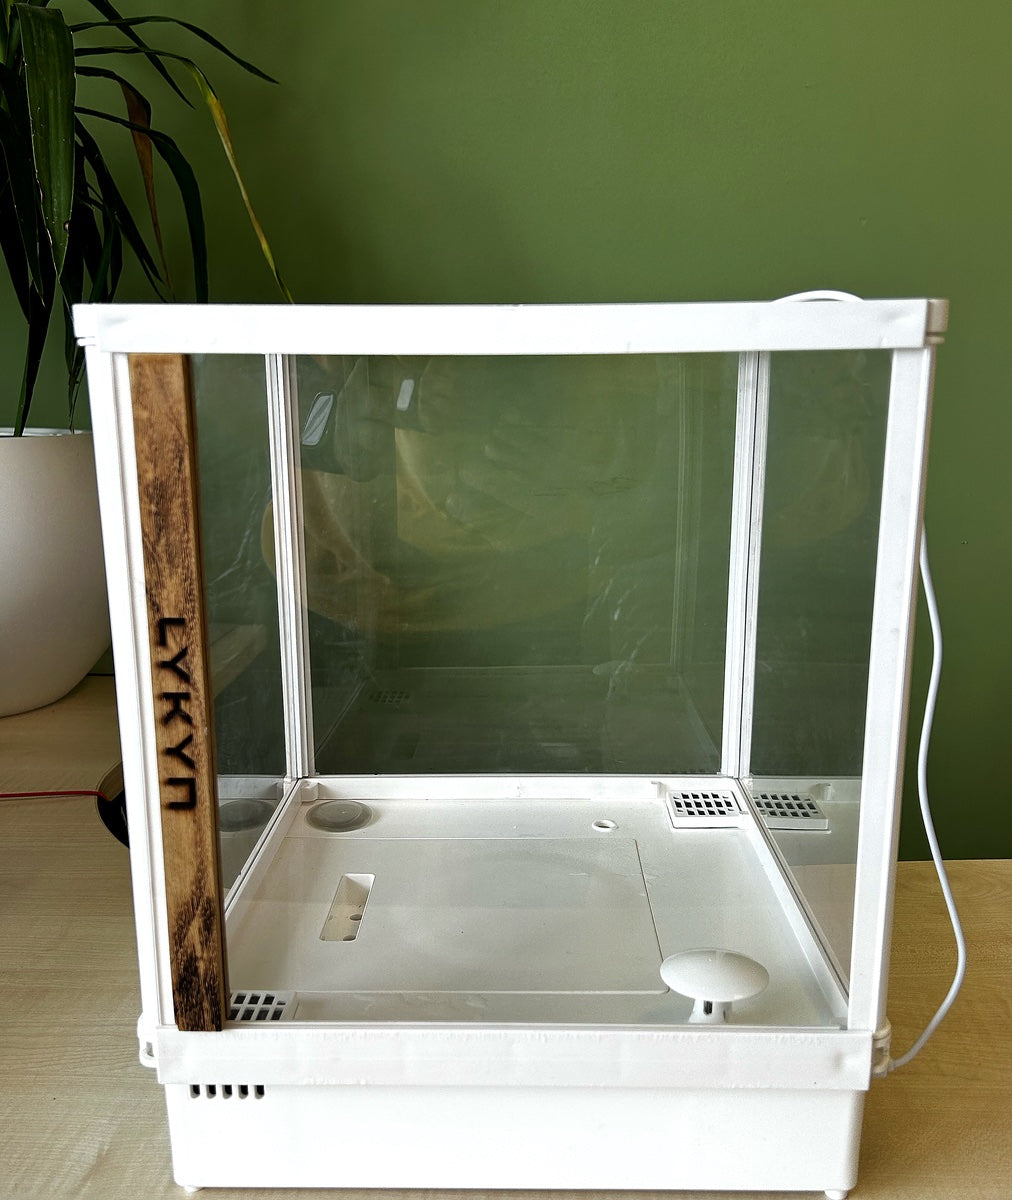
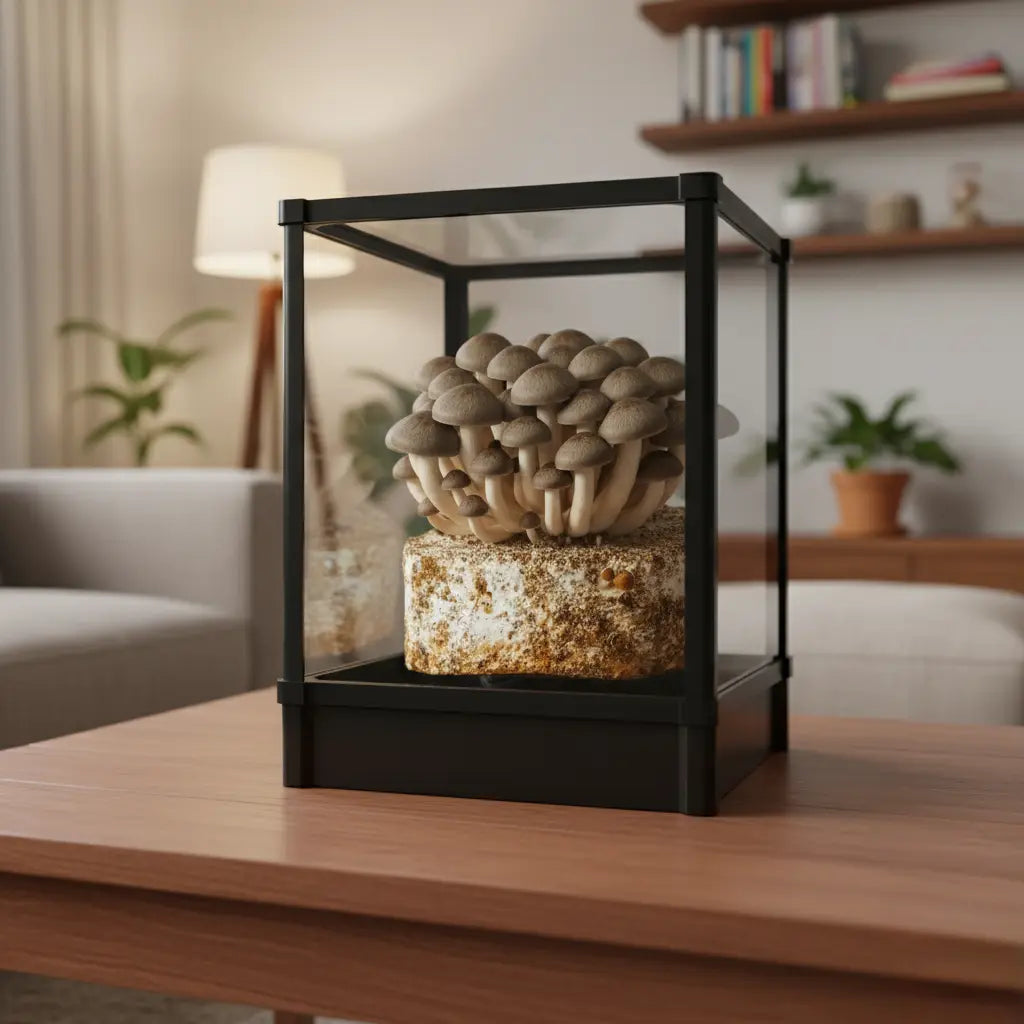
Smart Chamber. Bone White Single
- 2.8L tank, 90% humidity automatic
- App-controlled, plug-and-play
- 6 lb block ceiling, in stock

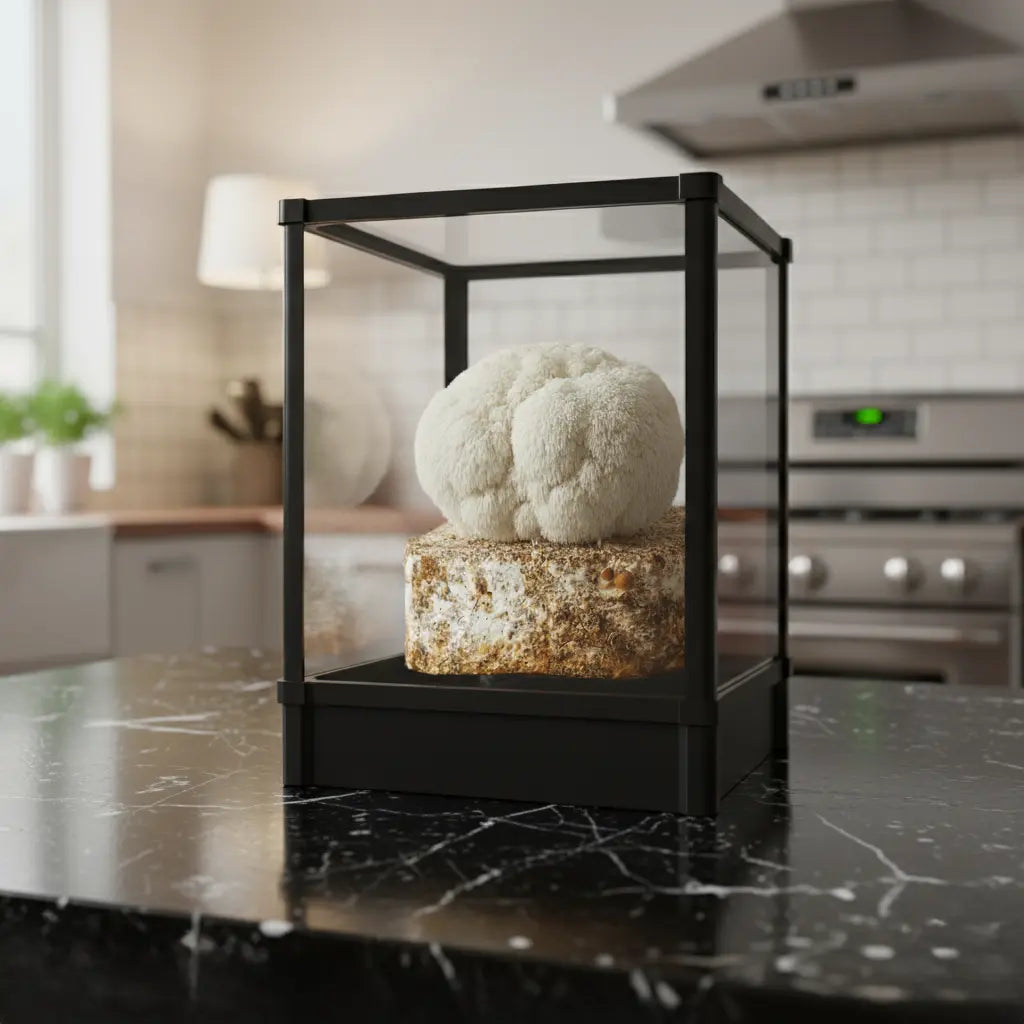
Smart Chamber. Obsidian Black Single
- Same hardware as Bone White
- Matte black premium finish
- Pairs with any kitchen palette

The investment in a mushroom grow tent can quickly pay for itself. Gourmet and medicinal mushrooms often command premium prices at markets, with varieties like lion's mane, oyster, and shiitake frequently selling for $12-24 per pound. With a well-designed grow tent, you can produce these same mushrooms for a fraction of the retail cost while ensuring they're grown organically to your personal standards.
Whether you're fascinated by fungi, interested in sustainable food production, or simply love cooking with fresh mushrooms, building your own mushroom oasis is a rewarding project that combines science, craftsmanship, and natural cultivation in one fulfilling hobby.
Understanding Mushroom Growing Fundamentals
Before diving into the specifics of building your mushroom grow tent, it's essential to understand the basic lifecycle and needs of fungi:
-
The mushroom lifecycle:
- Spores germinate to form mycelium (the vegetative part of fungi)
- Mycelium colonizes a substrate (growing medium)
- When conditions are right, the mycelium produces fruiting bodies (the mushrooms)
- Mature mushrooms release spores, completing the cycle
-
Essential environmental factors:
- Humidity: Most mushrooms require 80-95% relative humidity
- Temperature: Different species have specific temperature ranges (typically 55-75°F/13-24°C)
- Light: Contrary to popular belief, most mushrooms need some light to form properly
- Fresh air exchange: Critical for triggering fruiting and preventing CO₂ buildup
- Cleanliness: Reducing competing microorganisms is essential for success
-
Key cultivation phases:
- Inoculation: Introducing mushroom spawn to prepared substrate
- Colonization: The mycelium growth period (often in darkness)
- Fruiting: The production of actual mushrooms (requiring specific environmental triggers)
- Harvesting: Collecting mature mushrooms at their peak
- Rest/Recharge: Some substrates can produce multiple flushes of mushrooms
-
Growing methods compatible with tents:
- Fruiting blocks: Pre-colonized substrate blocks ready for fruiting
- Bucket or bag cultivation: Using plastic containers filled with substrate
- Log culture: Using small logs or totems for wood-loving species
- Bottle or jar cultivation: Small-scale production in glass containers
Understanding these fundamentals will help you design a grow tent that addresses the specific needs of mushrooms throughout their entire growth cycle while avoiding common pitfalls that lead to contamination or poor yields.
Planning Your Mushroom Grow Tent
Selecting the Ideal Location
Finding the right spot for your mushroom grow tent significantly impacts your cultivation success:
-
Temperature considerations:
- Choose a location with relatively stable ambient temperature
- Avoid areas near heating vents, radiators, or sunny windows
- Basements often provide naturally cool, stable environments
- Consider seasonal temperature fluctuations in your chosen space
-
Practical logistics:
- Proximity to water source for maintaining humidity and cleaning
- Access to electricity for fans, humidifiers, and lights
- Sufficient space for working around the tent and storage
- Floor surface that can handle occasional water spills
- Minimal foot traffic to reduce contamination risk
-
Environmental concerns:
- Good air quality (avoid dusty spaces or areas with mold issues)
- Protection from insects and pests
- Limited exposure to household chemicals and cleaning products
- Ability to clean the surrounding area easily
-
Spatial requirements:
- Minimum recommended space: 3×3 feet floor area plus 6 feet height
- Allow additional space for equipment storage and working area
- Consider doorway access if using a pre-built tent structure
- Plan for potential expansion as your mushroom hobby grows
-
Household integration:
- Consider noise from fans and humidifiers
- Account for light leakage during night hours
- Evaluate potential humidify impacts on surrounding areas
- Discuss placement with household members to ensure alignment
The ideal location balances environmental stability with practical access, allowing you to maintain your mushroom oasis with minimal effort while avoiding potential conflicts with your living space.
Determining the Right Size and Configuration
Your mushroom grow tent's dimensions and layout should align with your cultivation goals and available space:
-
Production capacity considerations:
- Small tent (2×2×4 feet): Produces 1-2 pounds of mushrooms weekly
- Medium tent (3×3×6 feet): Yields 3-5 pounds weekly
- Large tent (4×4×7 feet): Can generate 5-10+ pounds weekly
- Consider staggering production for consistent harvests
-
Growing style impact on size:
- Vertical shelving increases capacity without expanding footprint
- Hanging cultivation (bags/buckets) requires overhead support
- Floor-based containers need adequate surface area
- Include space for equipment like humidifiers and fans
-
Multi-chamber possibilities:
- Colonization chamber (higher temperature, darkness)
- Fruiting chamber (controlled light, high humidity)
- Preparation area (for substrate work and cleaning)
- Consider dividing larger tents with plastic sheeting for different zones
-
Access and ergonomics:
- Front-opening design for easy mushroom harvesting
- Height that allows comfortable reaching of all areas
- Sufficient interior space for working without disturbing other cultures
- Strategic placement of shelving at comfortable heights
-
Future expansion planning:
- Modular designs that can be expanded later
- Space allowed for additional tents as your hobby grows
- Electrical capacity for additional equipment
- Consider how multiple tents might function together
Beginners often do best starting with a medium-sized tent (3×3×6 feet) that offers flexibility for various growing methods while not overwhelming your space or budget. This size provides room to experiment with different species and techniques while producing a meaningful harvest.
Essential Components for Your Mushroom Grow Tent
The Tent Structure
The physical enclosure forms the foundation of your mushroom growing environment:
-
Commercial grow tent options:
- Purpose-built grow tents ($70-200) offer reflective interiors and built-in supports
- Typically made from 600D canvas with light-proof design
- Include ports for ventilation and cable management
- Feature zippered doors for easy access
- Available in various dimensions to suit different spaces
-
DIY tent alternatives:
- PVC frame with plastic sheeting ($30-50)
- Converted closet or cabinet with sealed edges
- Modified plastic storage shelving wrapped in plastic
- Repurposed shower stall or bathtub enclosure
- Insulated coolers or totes for micro-grows
-
Critical structural features:
- Light-blocking capability to control photoperiods
- Waterproof floor to contain humidity and spills
- Sufficient height for standing crops and equipment
- Stable construction that won't collapse when bumped
- Easy-to-clean surfaces to maintain hygiene
-
Material considerations:
- Mold-resistant fabrics or coatings
- Non-toxic materials safe for food production
- Reflective interior to maximize light efficiency
- Durability to withstand constant high humidity
- Repair-friendly design for inevitable wear and tear
-
Setup recommendations:
- Assemble on a level surface away from direct sunlight
- Ensure adequate ceiling clearance for fully extended tent
- Position access points for convenient reach
- Secure any tall structures to prevent tipping
- Consider adding a secondary containment tray for leak protection
Whether purchased or built, your tent structure should create a sealed environment that can be easily cleaned, accessed, and maintained while providing stable support for shelving and equipment.
Climate Control Systems
Creating and maintaining ideal growing conditions requires several key components:
-
Humidity management:
- Ultrasonic humidifier ($30-80): Produces fine mist without heat
- Humidity controller ($25-50): Automatically maintains target humidity
- Hygrometer ($10-20): Monitors relative humidity levels
- Humidity retention methods: Perlite beds, water trays, or wet towels
- Manual misting bottle ($5-10): For supplemental humidity in specific areas
-
Temperature regulation:
- Digital thermometer ($10-20): Monitors ambient temperature
- Small space heater with thermostat ($30-50): For winter months
- USB fans for cooling ($15-30): Reduces temperature in warm conditions
- Seedling heat mats ($20-30): Creates warm zones for tropical species
- Temperature controller ($25-40): Automates heating/cooling cycles
-
Air exchange system:
- Inline duct fan ($30-80): Creates consistent air movement
- Carbon filter (optional, $50-100): Reduces spore release into home
- Passive intake vents: Allows fresh air to enter naturally
- Oscillating fan ($15-30): Prevents stagnant air pockets
- Timer ($10-20): Automates fan operation schedules
-
Lighting setup:
- LED grow light ($40-100): Provides proper spectrum for mushroom formation
- Light timer ($10-20): Automates day/night cycles
- Light positioning system: Adjustable height hooks or chains
- Light spectrum considerations: Blue-enriched light often preferred for mushrooms
- Light-proof covering: Prevents light leaks during dark periods if needed
-
Integrated control options:
- Environmental controllers ($80-200): All-in-one devices that monitor and adjust multiple parameters
- Smart plugs with monitoring ($20-40): Allow remote monitoring and control
- Data loggers ($30-60): Track conditions over time to optimize growing
- Backup power solutions: Maintains critical systems during outages
- Alarm systems: Alert you to dangerous condition changes
The complexity of your climate control system can evolve as your experience grows. Many beginners start with basic equipment (humidifier, fans, and monitoring devices) and add automation as they identify specific needs.
Shelving and Organization
Efficient use of space maximizes production and simplifies maintenance:
-
Shelving options:
- Wire shelving units ($40-80): Allows air circulation and is easy to clean
- PVC pipe constructions ($20-40): Custom-built to fit your exact space
- Plastic greenhouse shelving ($30-60): Designed to handle moisture
- Hanging systems for bag cultivation: Utilizing vertical space
- Staggered or tiered designs: Accommodates mushrooms of different heights
-
Surface materials:
- Food-grade plastic trays ($5-15 each): Contains moisture and provides drainage
- Perlite beds: Maintains high humidity around fruiting blocks
- Greenhouse trays with humidity domes: Creates microenvironments
- Non-absorbent, washable surfaces: Prevents bacterial growth
- Removable liners: Facilitates easy cleaning between grows
-
Organizational strategies:
- Label all cultures with species and dates
- Group similar species with shared environmental needs
- Arrange by growth stage (colonizing separated from fruiting)
- Create designated clean vs. working zones
- Implement clear workflows to minimize contamination
-
Ergonomic considerations:
- Position most frequently harvested species at comfortable heights
- Allow sufficient space between shelves for mushroom development
- Ensure all areas are visible for daily monitoring
- Create clear paths for air circulation
- Design for easy access to water and cleaning supplies
-
Maximizing production density:
- Vertical stacking of compatible species
- Alternating tall and short varieties
- Using wall space for hanging cultivation
- Multi-tiered shelving with appropriate lighting for each level
- Strategic placement based on species' spatial requirements
Well-planned organization not only increases your potential yield but also simplifies maintenance and reduces contamination risks by creating logical workflows and separation between different growth stages.
Building Your Mushroom Grow Tent: Step-by-Step
Materials and Tools List
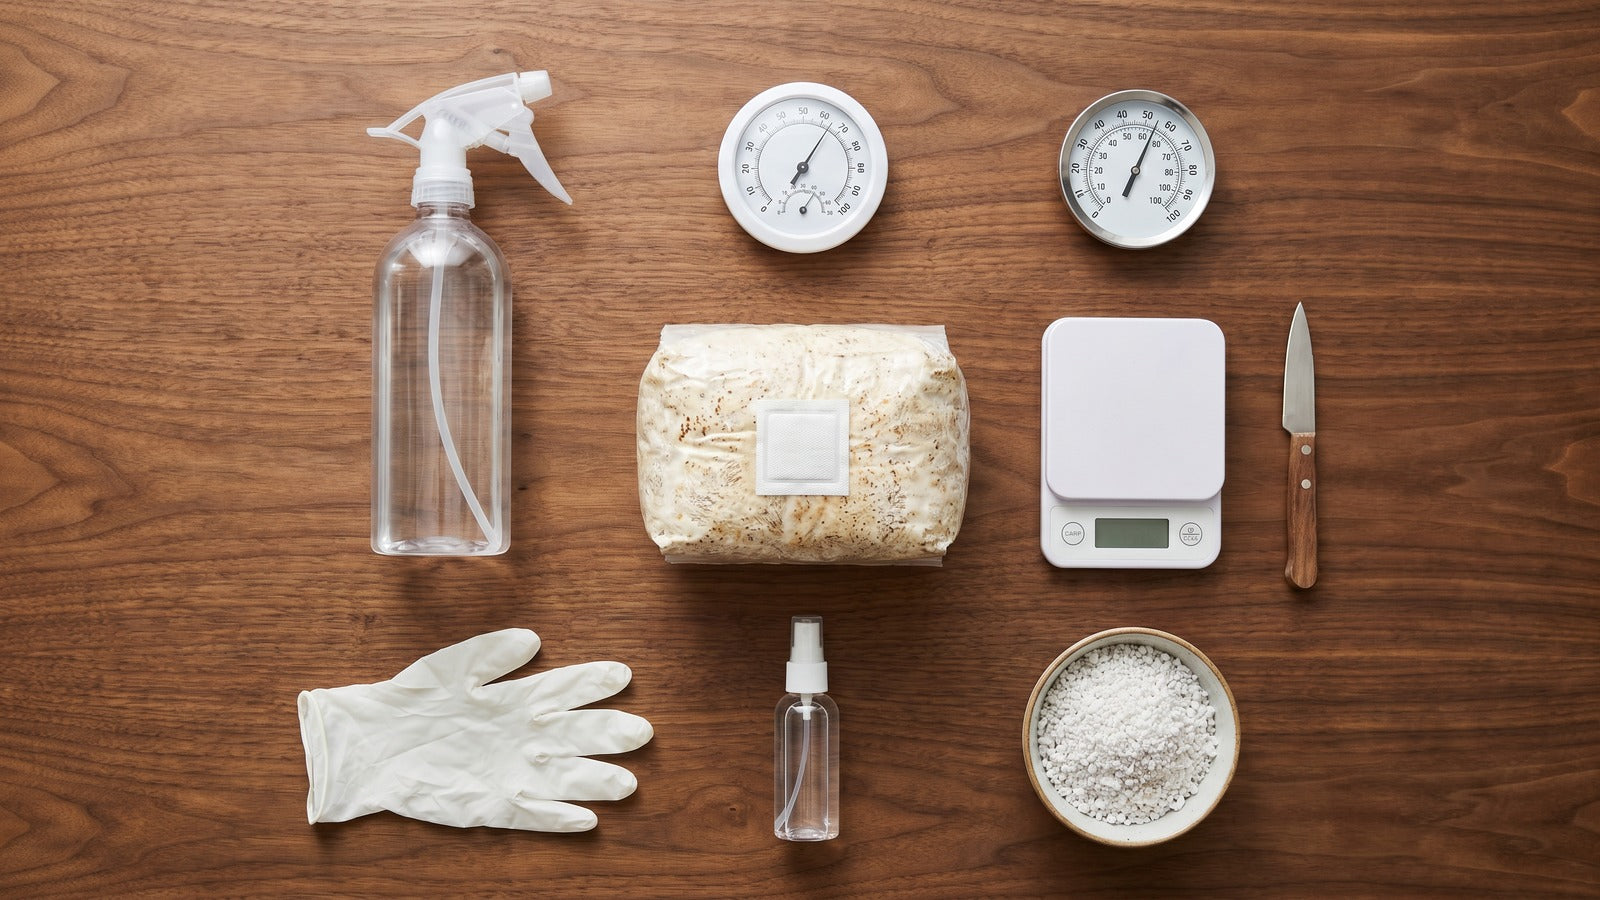
Before beginning construction, gather these essential supplies:
-
Tent structure components:
- Commercial grow tent OR
- PVC pipes and connectors (1-inch diameter)
- Heavy-duty plastic sheeting (6-mil thickness)
- Reflective material (mylar, foil-backed insulation, or white plastic)
- Duct tape and zip ties
- Waterproof tray or pond liner for flooring
-
Environmental control equipment:
- Humidifier (ultrasonic recommended)
- Digital hygrometer/thermometer
- Small fans (both inline and oscillating)
- LED grow light with adjustable height system
- Timers for lights and fans
- Humidity controller (optional but recommended)
-
Shelving and organization:
- Wire shelving unit or materials for custom shelving
- Plastic trays for each shelf
- Perlite, vermiculite, or pebbles for humidity trays
- Spray bottle for manual misting
- Labels and waterproof marker
-
Tools required:
- Measuring tape
- Scissors or utility knife
- Drill with bits (for ventilation holes if needed)
- Level
- Screwdriver
- Pipe cutter (if building PVC frame)
-
Safety and sanitization supplies:
- Rubber gloves
- Face mask (for protection from cleaning agents)
- Isopropyl alcohol (70%)
- Spray bottles for cleaning solutions
- Paper towels and microfiber cloths
-
Optional but useful additions:

Fuel Your Mushroom Journey
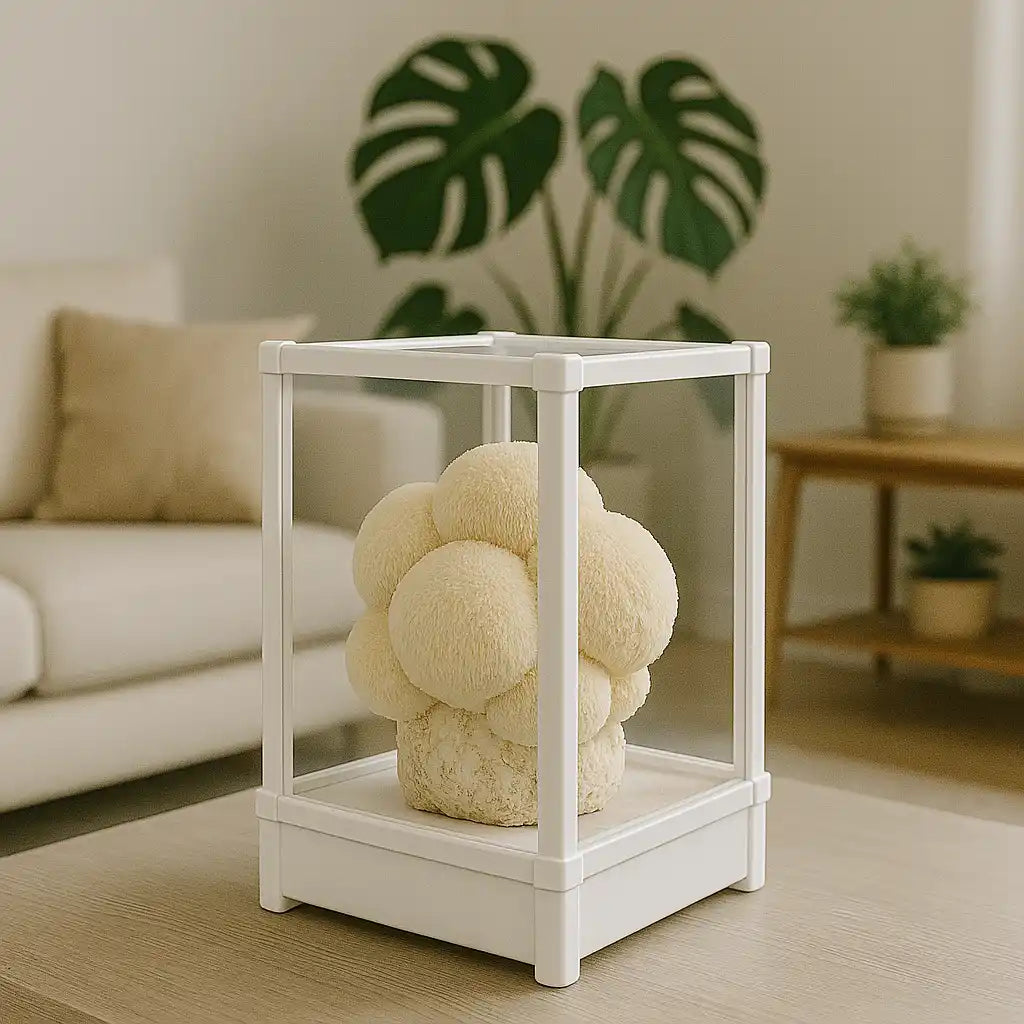
Smart Mushroom Grow Chamber
Plug-and-play smart chamber with humidity, light, and airflow dialed in for every species. Beginners harvest their first flush in days, not months.
Add to cart $299- Small portable table for workspace
- Storage containers for supplies
- Clip-on task light for harvesting
- Thermostatic heater for winter months
- Hygrometer with probe for substrate monitoring
The total investment for a basic setup ranges from $150-300, depending on how many components you purchase new versus repurpose from existing materials. Commercial grow tents will be at the higher end but offer convenience and reliability.
Assembly Instructions
Follow these steps to create your mushroom oasis:
-
Site preparation:
- Clear and clean the designated space thoroughly
- Ensure floor is level and can support the fully loaded tent
- Identify convenient power outlets and water sources
- Measure the area carefully to confirm fit
-
Tent structure assembly:
-
For commercial grow tents:
- Follow manufacturer's instructions for frame assembly
- Attach fabric covering, ensuring all zippers function properly
- Secure ventilation ports in desired configuration
-
For DIY PVC frame tent:
- Cut PVC pipes to measured lengths (typically 4 vertical supports, 8 horizontal connectors)
- Assemble frame using appropriate connectors
- Wrap structure with plastic sheeting, leaving access point
- Secure plastic with duct tape or clips
- Add reflective material to interior surfaces
-
For commercial grow tents:
-
Ventilation system installation:
- Install inline fan at top of tent for air exhaust
- Create passive air intake ports at bottom of tent
- Position oscillating fan for internal air circulation
- Connect fans to timers if using automated cycles
- Test airflow pattern using smoke test or tissue paper
-
Shelving setup:
- Assemble shelving units according to manufacturer instructions
- Ensure stability and level positioning
- Place water-resistant trays on each shelf
- Add perlite or humidity retention material to trays
- Arrange shelving to allow air circulation between levels
-
Environmental control installation:
- Position humidifier in location that distributes moisture evenly
- Mount hygrometer/thermometer at mushroom level (not floor or ceiling)
- Install LED lighting with adjustable hanging system
- Connect all electrical components through timers or controllers
- Test all systems individually before combined operation
-
Final configuration:
- Create designated clean area for harvesting and maintenance
- Establish ventilation settings based on ambient conditions
- Program light cycles appropriate for your mushroom species
- Set up humidity controller to target 85-95% relative humidity
- Conduct 24-hour test run before introducing mushroom cultures
Remember that the construction process itself presents contamination risks to future mushroom growth. Wear clean clothes, work in a clean environment, and sanitize all components that will be inside the tent before final assembly.
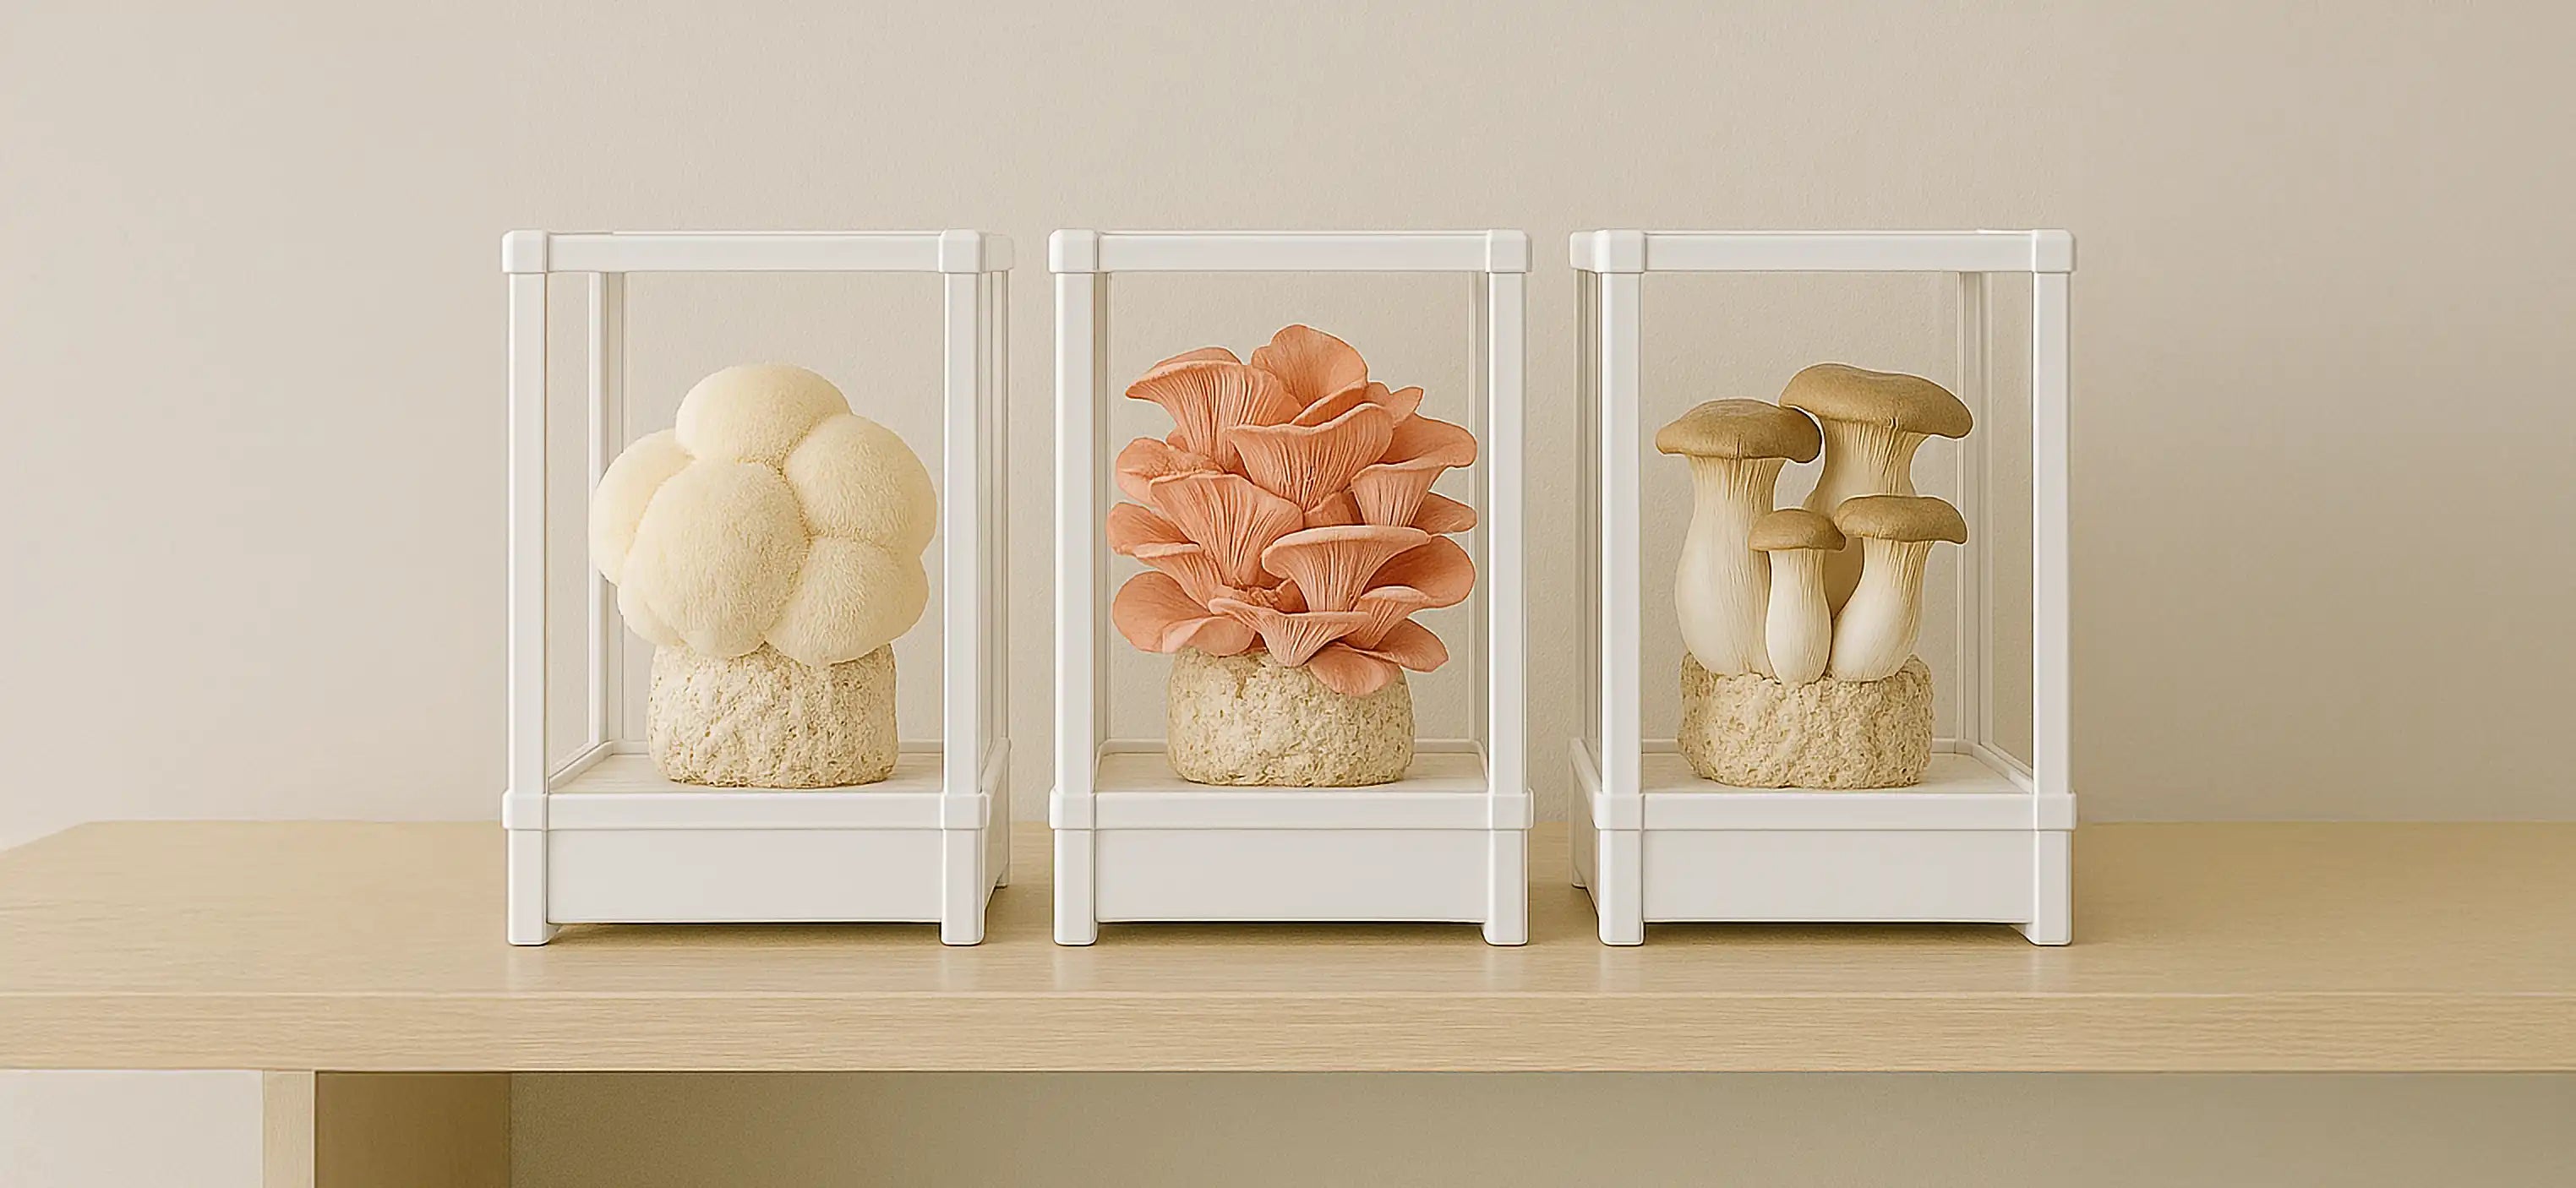
Customization for Different Mushroom Species
Adjust your grow tent setup to accommodate the specific needs of different mushroom varieties:
-
Oyster mushrooms (Pleurotus species):
- Temperature range: 55-75°F (13-24°C)
- Humidity: 85-95%
- Light: Moderate indirect light (12 hours on/off cycle)
- Air exchange: Significant - 4-8 exchanges per hour
- Substrate: Straw, hardwood sawdust, coffee grounds
- Special considerations: Grows well on vertical surfaces; benefits from higher CO₂ during colonization, then needs very fresh air for fruiting
-
Shiitake (Lentinula edodes):
- Temperature range: 55-70°F (13-21°C)
- Humidity: 75-85%
- Light: Low to moderate indirect light
- Air exchange: Moderate - 3-5 exchanges per hour
- Substrate: Hardwood logs or supplemented sawdust blocks
- Special considerations: Benefits from "shocking" (cold water bath or temperature drop) to initiate fruiting
-
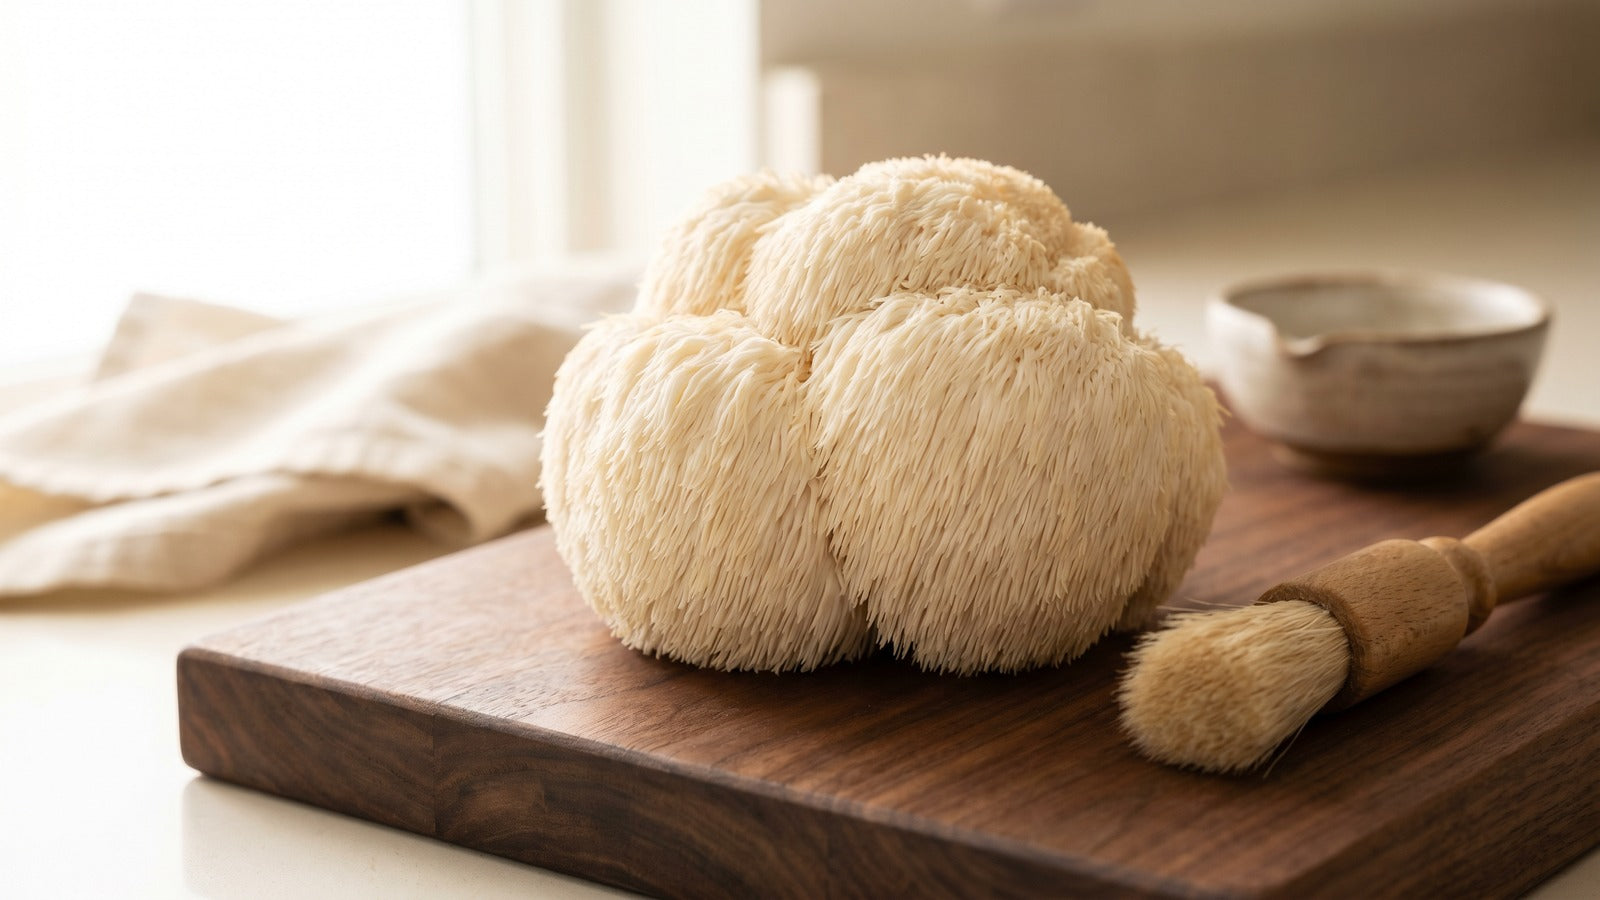
Lion's Mane (Hericium species):
- Temperature range: 65-75°F (18-24°C)
- Humidity: 85-90%
- Light: Low indirect light
- Air exchange: Moderate - 3-5 exchanges per hour
- Substrate: Hardwood sawdust with supplements
- Special considerations: Very sensitive to CO₂ levels; benefits from higher humidity during primordial formation
-
King Oyster (Pleurotus eryngii):
- Temperature range: 60-70°F (15-21°C)
- Humidity: 80-90%
- Light: Moderate indirect light
- Air exchange: Moderate - 3-6 exchanges per hour
- Substrate: Hardwood sawdust with wheat bran supplement
- Special considerations: Prefers slightly lower humidity than other oysters; benefits from bottom watering
-
Reishi (Ganoderma lucidum):
- Temperature range: 70-80°F (21-27°C)
- Humidity: 70-85%
- Light: Low indirect light
- Air exchange: Low - 2-4 exchanges per hour
- Substrate: Hardwood logs or supplemented sawdust
- Special considerations: Longer growing cycle; can tolerate lower humidity than most species
For growing multiple species simultaneously, create microenvironments within your tent by:
- Using humidity domes for species needing higher moisture
- Positioning higher-light species on upper shelves
- Placing species with similar needs on the same level
- Using small fans to create varied airflow patterns
- Implementing localized heating mats for warm-loving species
This customization allows you to diversify your mushroom production while maximizing the efficiency of your grow tent space.
Operating Your Mushroom Grow Tent
Day-to-Day Management
Consistent monitoring and maintenance routines ensure mushroom growing success:
-
Daily checks and tasks:
- Monitor temperature and humidity levels (morning and evening)
- Ensure all equipment is functioning properly
- Check water levels in humidifiers and refill as needed
- Look for signs of mushroom development or contamination
- Harvest any mature mushrooms
- Mist directly if needed for surface humidity (species-dependent)
-
Weekly maintenance procedures:
- Clean and disinfect any harvested areas
- Rotate growing blocks for even fruiting if needed
- Check for and clean any algae growth on humid surfaces
- Inspect and clean fan blades to prevent mold buildup
- Review timer settings and adjust as needed
- Check for leaks, condensation issues, or equipment wear
-
Monthly deep maintenance:
- Completely empty and clean tent interior
- Disinfect all shelving and non-porous surfaces
- Replace any worn plastic or deteriorated materials
- Clean and descale humidifiers according to manufacturer instructions
- Check and clean ventilation ports and filters
- Calibrate hygrometers and thermometers if necessary
-
Record keeping best practices:
- Maintain a growing journal with daily environmental readings
- Document when each culture was introduced and harvested
- Track yields and conditions for each successful flush
- Note any contamination issues and possible causes
- Record equipment maintenance dates and procedures
- Photograph unusual growth patterns or concerns for research
-
Resource management:
- Establish schedules for recurring supply needs
- Rotate fruiting blocks at different stages for continuous harvests
- Plan substrate preparation in advance of needs
- Create systems for efficient workspace transitions
- Develop contamination response protocols
Consistent daily management not only improves yields but helps identify potential problems before they become serious. Successful growers often say that observation is their most valuable tool.
Troubleshooting Common Issues
Even well-designed mushroom grow tents can experience challenges. Here's how to address common problems:
-
Humidity-related issues:
-
Problem: Humidity too low (below 80%)
- Solutions: Check humidifier function, reduce air exchange rate, add humidity trays with perlite, seal any leaks in tent structure
-
Problem: Excessive condensation on walls
- Solutions: Increase air circulation, slightly reduce humidifier output, adjust temperature to reduce condensation points
-
Problem: Humidity too low (below 80%)
-
Temperature challenges:
-
Problem: Temperature too high
- Solutions: Increase ventilation, add cooling fans, relocate tent to cooler area, operate lights during cooler parts of day
-
Problem: Temperature too low
- Solutions: Add small space heater with thermostat, install seedling heating mats under trays, insulate tent exterior
-
Problem: Temperature too high
-
Growth abnormalities:
-
Problem: Long, thin stems with small caps
- Solutions: Increase fresh air exchange, ensure adequate light, verify species-appropriate temperature
-
Problem: No fruiting despite colonized substrate
- Solutions: Introduce fruiting triggers (temperature drop, increased FAE, light cycle change), verify substrate moisture content
-
Problem: Long, thin stems with small caps
-
Contamination issues:
-
Problem: Green or black mold on substrate
- Solutions: Immediately remove affected blocks, increase air circulation, review sanitation procedures, check for source contamination
-
Problem: Bacterial contamination (slimy appearance, strong odor)
- Solutions: Remove affected materials, disinfect surrounding area, reduce excess moisture, review water quality
-
Problem: Green or black mold on substrate
-
Equipment failures:
-
Problem: Humidifier stopped working
- Solutions: Clean mineral buildup, check water level sensors, implement backup humidity methods until repaired
-
Problem: Fan failure
- Solutions: Clean dust from motor, check electrical connections, temporarily replace with alternative air movement system
-
Problem: Humidifier stopped working
-
Pest management:
-
Problem: Fungus gnats
- Solutions: Install fine mesh screens on ventilation ports, use sticky traps, reduce surface moisture
-
Problem: Mites
- Solutions: Maintain cleanliness, use predatory mites as biocontrol, isolate affected cultures
-
Problem: Fungus gnats
When troubleshooting, change only one variable at a time and allow 24-48 hours to observe effects before making additional changes. This methodical approach helps identify the true causes of issues without creating new problems.
Advanced Techniques for Mushroom Grow Tents
Automation and Monitoring Systems
Elevate your mushroom growing with technology that improves consistency and reduces daily maintenance:
-
Integrated environmental controllers:
- All-in-one devices that monitor and adjust multiple parameters
- Programmable settings for different growing phases
- Data logging capabilities to track conditions over time
- Alarm functions for out-of-range conditions
- Remote monitoring via smartphone apps
-
Automated misting systems:
- Ultrasonic or pressure misting on timers
- Humidity-activated systems that maintain precise levels
- Directional misting for targeted humidity
- Multi-zone capability for different species requirements
- Water filters to prevent mineral buildup and contamination
-
Climate monitoring innovations:
- Wireless sensor networks throughout the tent
- CO₂ monitoring and regulation
- Multiple temperature and humidity zones
- Substrate moisture probes
- Automated data graphing for trend analysis
-
Smart tent features:
- Programmed environmental shifts to trigger fruiting
- Automated response to seasonal ambient changes
- Remote control via internet connection
- Integration with smart home systems
- Backup power systems for critical functions
-
Growth phase automation:
- Preprogrammed light spectrum shifts for different growth stages
- Temperature cycling to simulate natural conditions
- Humidity ramping schedules for primordia formation
- Automatic substrate hydration systems
- Sequential harvesting reminders based on growth tracking
The investment in automation typically ranges from $100-500 beyond basic setup costs, but can significantly improve results while reducing daily time commitment. Start with automating your most critical environmental factor (usually humidity control) and expand as your experience and budget allow.
Scaling Up Your Mushroom Production
As your skills develop, expand your mushroom growing operation thoughtfully:
-
Multi-tent specialization:
- Dedicated colonization tent (warmer, higher CO₂, darker)
- Specialized fruiting chamber (precise conditions for specific species)
- Separate experimental space for trying new techniques
- Quarantine area for new cultures and testing
- Preparation room for substrate work and tool sanitization
-
Increased production strategies:
- Staggered production scheduling for continuous harvests
- Bulk substrate preparation methods
- Grain spawn multiplication techniques
- Multiple strain cultivation of same species
- Intentional crop rotation for space optimization
-
Workflow optimization:
- Establish clean room protocols for spawn work
- Create dedicated cleaning station for tools and equipment
- Implement FIFO (First In, First Out) systems for cultures
- Develop Standard Operating Procedures (SOPs) for all tasks
- Schedule regular maintenance during natural growing cycles
-
Infrastructure improvements:
- Dedicated water filtration systems
- Air purification and filtration
- Improved insulation for temperature stability
- Workspace ergonomics for comfortable harvesting
- Storage solutions for supplies and equipment
-
Sustainability enhancements:
- Solar power for electrical systems
- Rainwater collection (properly filtered)
- Spent substrate recycling systems
- Local waste stream integration for substrates
- Energy-efficient equipment upgrades
When scaling up, maintain focus on quality over quantity, especially if considering commercial sales. Consistent results and contamination control become increasingly important as your operation grows.
Conclusion: Growing Success with Your Mushroom Oasis
Creating your own mushroom grow tent opens the door to a fascinating world of fungi cultivation. This rewarding hobby combines principles of biology, engineering, and agriculture while providing delicious, nutritious harvests that connect you directly to your food source. The skills developed through mushroom cultivation, patience, observation, cleanliness, and systematic thinking, transfer to many other areas of life.
Begin your journey by starting small and focusing on reliable, forgiving species like oyster mushrooms. As you gain confidence, expand your mushroom repertoire to include more exotic and challenging varieties. Document your experiences, connect with other growers through online forums or local mycological societies, and don't be discouraged by initial setbacks, every experienced grower has stories of contamination and failure that ultimately led to greater understanding.
Remember that your mushroom grow tent is an evolving system that will improve with each growing cycle. Pay attention to what your mushrooms are telling you through their growth patterns, and adjust your setup accordingly. The perfect mushroom oasis isn't built in a day, but rather develops through ongoing observation, experimentation, and refinement.
With the information in this guide, you're well-equipped to begin your mushroom cultivation journey. Your first harvest of home-grown mushrooms will be a moment of pride and accomplishment, the literal fruits of your labor and attention to detail. Welcome to the fascinating world of indoor mushroom cultivation, where science meets art in the creation of your personal fungal paradise.


Share:
How to Grow Wasabi: Complete Step-by-Step Guide for Beginners and Experts
How to Grow Wasabi: Complete Step-by-Step Guide for Beginners and Experts