

Introduction to Morel Dehydration
Morel mushrooms (Morchella species) are among the most prized edible fungi in the culinary world, known for their distinctive honeycomb-like caps, rich nutty flavor, and meaty texture. Their seasonal nature, typically available for just a few weeks each spring, makes preservation essential for enjoying these delicacies year-round. Among all preservation methods, dehydration stands out as the most effective way to maintain the flavor, nutritional value, and longevity of morel mushrooms.
Dehydrating morels not only extends their shelf life from days to months but actually enhances their flavor, creating a more concentrated umami taste that many chefs prefer over fresh specimens for certain dishes. Whether you're a forager with a bountiful harvest, a market shopper who found a great sale, or a culinary enthusiast wanting to preserve these seasonal treasures, learning how to dehydrate morel mushrooms properly will significantly expand your culinary possibilities.
This guide will walk you through the entire process of dehydrating morel mushrooms, from selection and preparation to storage and rehydration, ensuring you can enjoy these woodland delicacies long after their brief season has passed.

Benefits of Dehydrating Morel Mushrooms
Extended Shelf Life
The most obvious benefit of dehydration is the dramatic extension of shelf life:
- Fresh morels typically last only 5-7 days under ideal refrigeration conditions
- Properly dried morels can be stored for 6-12 months in appropriate containers
- Vacuum-sealed dried morels may maintain quality for up to 2 years
This extended preservation allows you to enjoy morels throughout the year, not just during their brief spring season.
Enhanced Flavor Profile
Many culinary experts actually prefer dried morels for certain applications because:
- The dehydration process concentrates the natural flavors, intensifying the earthy, nutty notes
- Unique flavor compounds develop during the drying process
- The reconstituting liquid becomes an additional flavor element for cooking
- Dried morels impart a more pronounced flavor in sauces, soups, and stews
Practical and Economic Benefits
Beyond preservation, dehydrating offers several practical advantages:
- Reduced storage space: Dried morels shrink to approximately 1/10th of their original volume
- Weight reduction: Makes transportation and storage much more efficient
- Reduced waste: Prevents spoilage of excess fresh morels
- Cost-effectiveness: Allows for purchasing or foraging in bulk during peak season when prices are lower
- Emergency preparedness: Creates a shelf-stable food source for your pantry
Nutritional Retention
Compared to other preservation methods, dehydration does an excellent job of maintaining nutritional value:
- Protein retention: Preserves the high protein content morels are known for
- Vitamin D preservation: Maintains much of the natural vitamin D, a notable nutrient in morels
- Mineral stability: Retains minerals like iron, copper, and potassium
- Fiber maintenance: Preserves the dietary fiber content
Selecting and Preparing Morels for Dehydration
Choosing the Best Specimens
Not all morels are equal candidates for dehydration. For best results:
- Select firm, fresh specimens: Avoid any that show signs of decay or sliminess
- Size considerations: Medium to large morels generally dehydrate more successfully than very small ones
- Maturity factors: Slightly more mature morels (with darker coloration) often dry better than very young ones
- Structural integrity: Choose mushrooms with intact honeycomb structures and stems
Cleaning Methods
Proper cleaning is critical before dehydration:
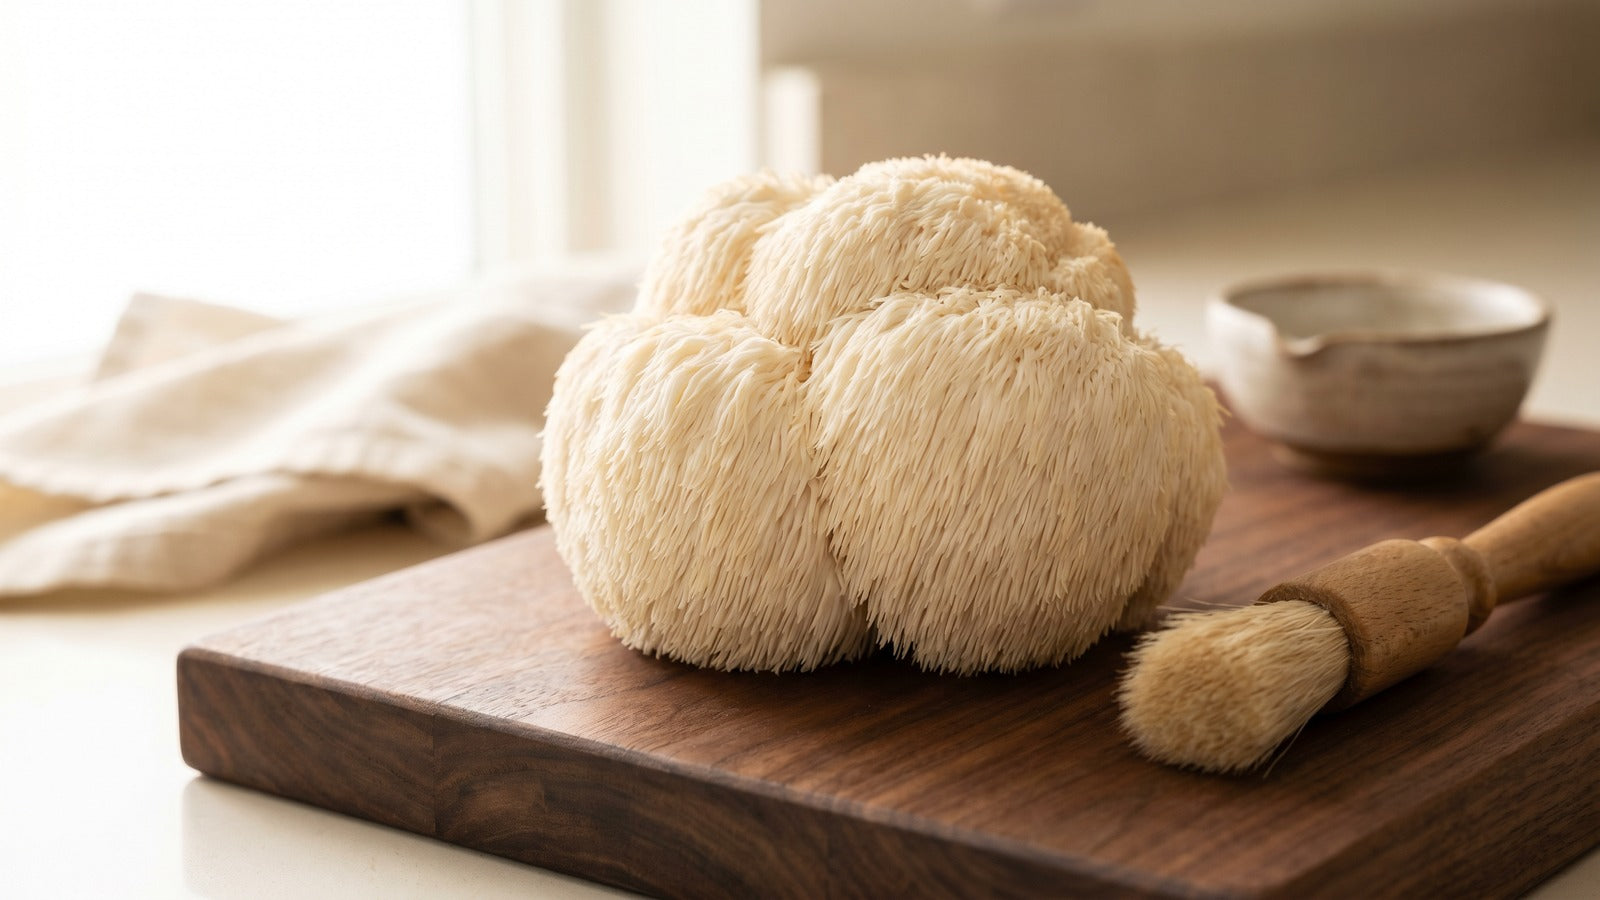
- Dry brushing: Use a soft mushroom brush or unused paintbrush to gently remove forest debris and dirt
- Visual inspection: Check the honeycomb holes for insects or debris, especially in the crevices
- Water decision: While some purists avoid water completely, most morels benefit from a quick rinse
- If washing: Briefly rinse under cold running water or swish in a bowl of cold water
- Soaking option: For very dirty specimens, a brief 5-minute soak in lightly salted water can help remove insects and debris
Cutting and Trimming
How you cut morels affects both the drying process and final quality:
-
Slice lengthwise: Cut morels in half from top to bottom, which:
- Exposes the hollow interior for faster, more even drying
- Makes it easier to inspect for insects and debris
- Creates uniform pieces for consistent drying times
- Trim the base: Remove any dirty or discolored portions at the stem base
- Size consistency: For very large morels, consider quartering instead of halving to maintain consistent thickness
- Whole option: Small morels can sometimes be dried whole, but will take significantly longer
Pre-Drying Considerations
These final preparation steps ensure optimal results:
- Pat dry: Use paper towels to gently remove excess surface moisture
- Air drying: Allow washed morels to air dry on paper towels for 1-2 hours before dehydrating
- Uniform arrangement: Plan how you'll arrange pieces to allow air circulation
- Consider blanching: Some experts recommend a very brief blanch (30 seconds) to set color and kill potential bacteria, though this is optional

Dehydration Methods Compared
Food Dehydrator Method
Using a dedicated food dehydrator is the most reliable approach:
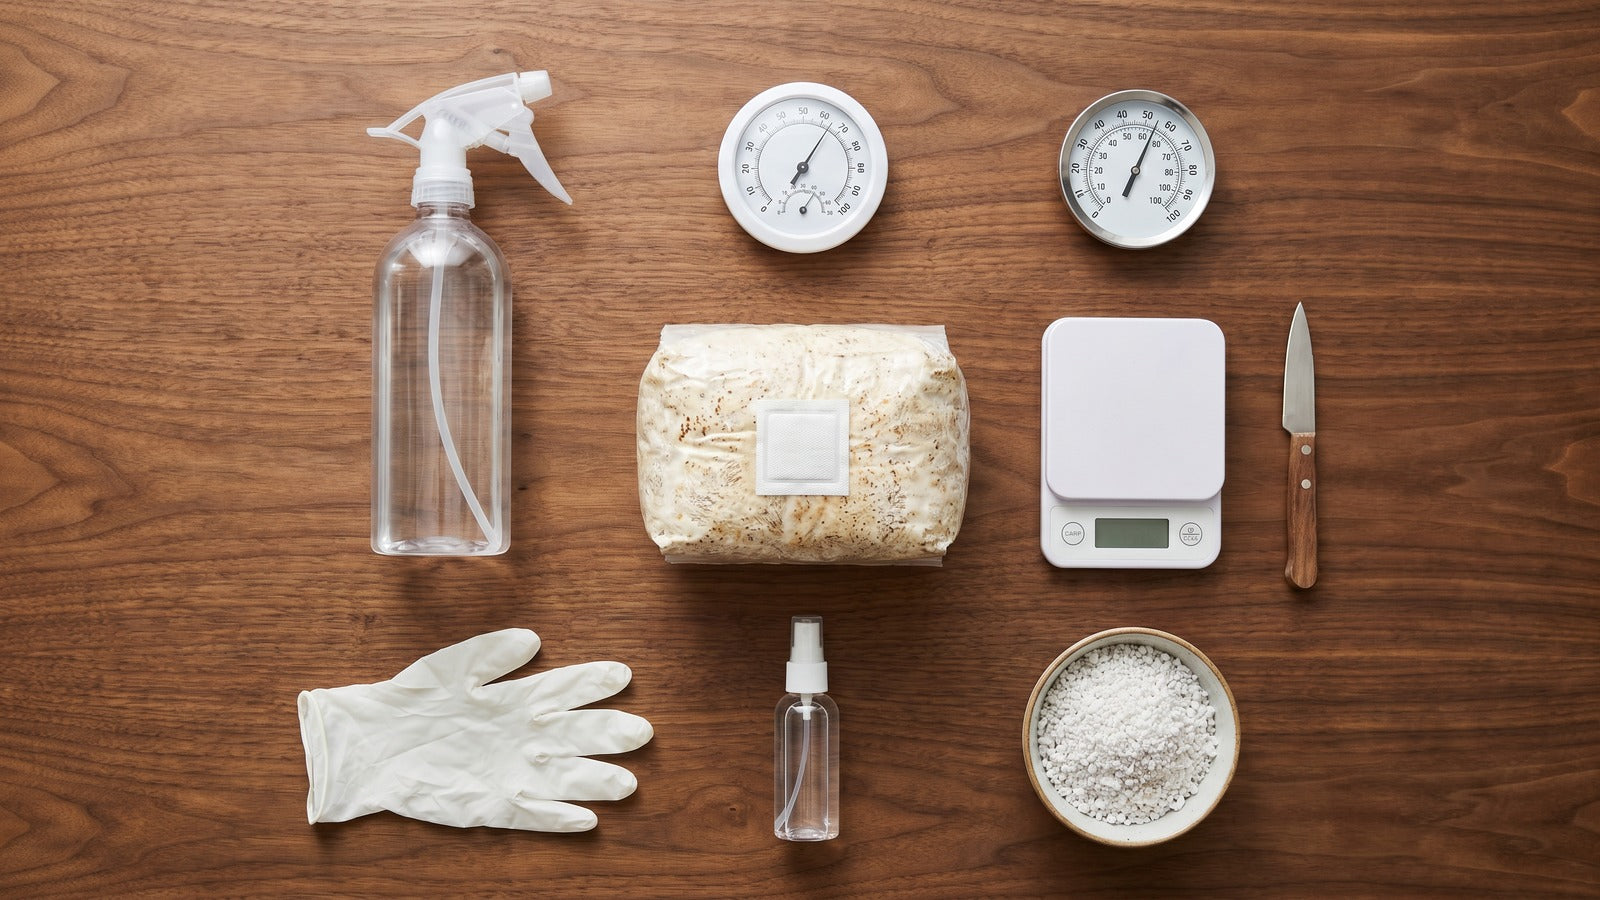
Equipment needed:
- Food dehydrator with temperature controls
- Dehydrator trays (mesh liners helpful for smaller pieces)
- Timer or clock for tracking
Process steps:
- Arrange prepared morel halves on dehydrator trays, leaving space between pieces
- Set temperature to 125°F-135°F (52°C-57°C)
- Dry for 8-12 hours, checking periodically
- Rotate trays if your dehydrator has uneven heating
- Test for complete dryness (morels should be crisp and brittle)
Advantages:
- Consistent temperature control
- Efficient air circulation
- Designed specifically for food dehydration
- Minimal risk of burning or uneven drying
Oven Drying Technique
For those without a dehydrator, a conventional oven can work:
Equipment needed:
- Oven with low temperature settings
- Baking sheets
- Parchment paper or silicone mats
- Oven thermometer (recommended)
Process steps:
- Preheat oven to lowest setting, ideally 140°F-150°F (60°C-65°C)
- Line baking sheets with parchment paper
- Arrange morel halves in a single layer with space between them
- Prop oven door slightly open with a wooden spoon to allow moisture to escape
- Dry for 6-10 hours, checking hourly after the first 4 hours
- Rotate trays periodically for even drying
Advantages:
- No special equipment required
- Larger capacity for big batches
- Works when a dehydrator isn't available
Challenges:
- Less precise temperature control
- Risk of overheating
- Less energy efficient
- Requires more attention
Air Drying Method
The traditional approach, suitable only in specific conditions:
Equipment needed:
- String or unflavored dental floss
- Needle for threading
- Paper bags (optional)
Process steps:
- Thread cleaned, halved morels onto string, leaving space between pieces
- Hang in a warm, dry location with good air circulation
- Keep away from direct sunlight
- Allow to dry for 2-4 days, depending on humidity and temperature
- Protect from dust with paper bags punched with holes
Advantages:
- No energy required
- Traditional method with minimal equipment
- No risk of overheating
Challenges:
- Weather dependent
- Requires very low humidity (below 60%)
- Higher risk of mold if conditions aren't perfect
- Takes significantly longer
- Less consistent results
Sun Drying Option
Possible in the right climate, but with significant limitations:
Equipment needed:
- Drying screens with fine mesh
- Protective covering (cheesecloth or similar)
Process steps:
- Arrange prepared morels on drying screens
- Cover with cheesecloth to protect from insects
- Place in direct sunlight during the hottest part of the day
- Bring indoors at night or if humidity rises
- Dry for 2-3 days, depending on sun intensity and humidity
Advantages:
- Energy-free method
- May enhance vitamin D content
Challenges:
- Highly weather dependent
- Works only in low-humidity, sunny climates
- Risk of partial rehydration overnight
- Vulnerability to insects and contamination
- Inconsistent results
Step-by-Step Dehydrator Method
Since the food dehydrator method is most reliable, here's a detailed walkthrough:
Preparing Your Dehydrator
- Clean thoroughly: Ensure all trays and components are clean and dry
- Check airflow: Confirm fans and vents are unobstructed
- Location setup: Place on a level surface with several inches of clearance around vents
- Tray preparation: If using liners, place them on trays
Arranging Morels for Optimal Drying
- Single layer rule: Arrange morel halves in a single layer, never stacking
- Spacing matters: Leave at least 1/4 inch between pieces to allow air circulation
- Positioning: Place cut-side up for faster initial drying
- Size sorting: Group similarly sized pieces on the same trays for even drying
- Rotation planning: Put larger pieces toward the back and sides where airflow is often stronger
Temperature and Timing Guidelines
- Initial temperature: Set to 125°F (52°C) for optimal results
- Drying duration: Expect 8-12 hours total drying time
- Progress check: At the 4-hour mark, rotate trays and check progress
- Temperature adjustments: If drying seems too slow, you may increase to 135°F (57°C)
- Final phase: Reduce temperature to 115°F (46°C) for final 2 hours if possible
Testing for Doneness
Properly dried morels should:
- Feel completely dry and brittle: No flexibility or bendability
- Snap cleanly when broken: Should break, not bend
- Have no cold feeling: When touched to lips, should feel warm, not cool (coolness indicates remaining moisture)
- Sound hollow: A light tap should produce a slight hollow sound
- Show no visible moisture: When broken, interior should be completely dry
Cooling and Conditioning Process
Don't skip these important final steps:
- Initial cooling: Turn off dehydrator and allow morels to cool completely inside for 1-2 hours
- Conditioning phase: Place in a glass jar, sealed but shaken daily for 5-7 days
- Moisture check: Watch for condensation inside the jar, which indicates incomplete drying
- Re-drying if needed: If any moisture appears, return to dehydrator for additional drying
Specialized Oven-Drying Techniques
Conventional Oven Approach
If using a conventional oven, these tips improve results:
- Temperature verification: Use an oven thermometer to confirm actual temperature
- Airflow enhancement: Place a fan near the propped-open oven door to improve circulation
- Heat distribution: Place a baking stone or cast iron pan on the bottom rack to help distribute heat evenly
- Rack positioning: Use upper-middle racks, away from heating elements
- Door management: Prop open with a wooden spoon or similar heat-resistant object by 1-2 inches
Convection Oven Advantages
If you have a convection oven, take advantage of its benefits:
- Fan circulation: The built-in fan improves air movement, similar to a dehydrator
- Lower temperature: Set 25°F lower than conventional oven recommendations
- Door position: Still beneficial to keep slightly ajar, though less critical
- Faster drying: Expect 25-30% reduction in drying time
- More even results: Less need to rotate trays frequently
Storing Dried Morel Mushrooms
Container Options
The right storage container makes a significant difference:
- Glass jars: Wide-mouth mason jars with tight-fitting lids are ideal
- Mylar bags: Food-grade mylar with zip-top or heat-sealed closure offers excellent protection
- Vacuum-sealed bags: Provide the longest shelf life but risk crushing delicate dried morels
- Avoid plastic containers: May transfer odors and are more permeable to air
Environmental Factors
Control these environmental elements for maximum shelf life:
- Temperature: Store between 50°F-70°F (10°C-21°C)
- Light exposure: Keep in dark or opaque containers to prevent degradation
- Humidity control: Maintain low humidity in the storage area
- Air circulation: While storage containers should be sealed, the storage area should have some air movement to prevent stagnant, humid conditions
- Odor isolation: Keep away from strong-smelling items as dried morels readily absorb odors
Enhancing Storage Longevity
These additional steps help maximize shelf life:
- Oxygen absorbers: Small packets can be added to containers to remove oxygen
- Silica gel packets: Help absorb any residual moisture
- Vacuum sealing: For longer-term storage (though may crush delicate pieces)
- Freezer option: Dried morels can be frozen for extended storage (2+ years)
- Multiple small containers: Better than one large container to minimize exposure each time you use some
Labeling Best Practices
Don't forget these important labeling elements:
- Drying date: Note when the morels were dehydrated
- Source information: Where they were found or purchased
- Variety: If known, specify the type of morel
- Pre-treatment: Note any pre-drying preparation methods
- Expected use-by date: Generally 6-12 months from drying

Rehydrating and Using Dried Morels
Rehydration Methods
Proper rehydration is critical for optimal texture and flavor:
- Warm water soak: Place dried morels in a bowl and cover with warm (not hot) water
- Timing matters: Soak for 20-30 minutes, or until fully plump and flexible
- Flavor enhancement: For added flavor, use broth, stock, or wine instead of water
- Weight trick: Keep morels submerged with a small plate or bowl
- Reserve liquid: Save the soaking liquid for cooking as it contains considerable flavor
Examining the Soaking Liquid
The rehydration liquid is culinary gold:
- Straining technique: Strain through a coffee filter or fine mesh to remove any grit
- Flavor assessment: Taste a small amount to gauge flavor intensity
- Reduction option: Can be reduced to concentrate flavors further
- Usage ideas: Perfect for risottos, sauces, soups, and gravies
- Storage limitation: Use within 48 hours or freeze in ice cube trays
Cooking with Rehydrated Morels
Rehydrated morels have some differences from fresh:
- Cooking time: Generally require less cooking time than fresh morels
- Texture expectations: Slightly chewier than fresh, but should not be rubbery
- Flavor intensity: More concentrated flavor that stands up to stronger ingredients
- Pairing suggestions: Work exceptionally well with cream, butter, mild meats, and spring vegetables
- Recipe adjustments: Use about 1/3 the volume of fresh morels called for in recipes
Creative Culinary Applications
Beyond basic cooking, try these specialized uses:
- Morel powder: Grind completely dried morels into powder for use as a seasoning
- Infused oils: Use dried morels to create flavorful cooking oils
- Compound butters: Mix finely chopped rehydrated morels into butter for a luxury spread
- Dried morel stock: Simmer dried pieces to create an intensely flavored base
- Morel salt: Mix ground dried morels with sea salt for a gourmet finishing touch

Troubleshooting Common Dehydration Issues
Addressing Mold Development
If you discover mold on your dried morels:
- Unfortunately: Moldy dried mushrooms cannot be salvaged and must be discarded
- Prevention: Ensure complete drying before storage
- Cause identification: Usually results from insufficient drying or improper storage
- Visual inspection: Check remaining containers from the same batch carefully
- Environment check: Evaluate storage conditions for excess humidity
Dealing with Insect Issues
If insects appear in stored dried morels:
- Freezer treatment: Place affected containers in freezer for 48 hours to kill insects
- Inspection: Carefully examine and potentially discard affected portions
- Prevention: Consider freezing all dried morels for 48 hours before long-term storage
- Storage review: Ensure containers are truly airtight
- Pantry check: Look for source of infestation in nearby stored products
Texture Problems
If rehydrated morels have texture issues:
- Too chewy: May indicate incomplete rehydration; soak longer or in warmer liquid
- Mushy texture: Often results from over-drying at too high temperature
- Brittle after cooking: May have been dried too quickly at excessive heat
- Woody stems: Consider removing stems before dehydrating older specimens
- Gritty texture: Improve cleaning process before dehydration
Flavor Concerns
Addressing unexpected flavor issues:
- Musty taste: May indicate improper drying or storage; discard if pronounced
- Bitter notes: Often from drying at too high temperature
- Bland flavor: May indicate old specimens or those stored too long
- Off flavors: Check for cross-contamination from other stored foods
- Excessive intensity: Dilute by mixing with fresh mushrooms in recipes
Safety Considerations
Food Safety Guidelines
Important safety factors to remember:
- Always cook: Even rehydrated morels should never be eaten raw
- Temperature monitoring: Use a thermometer to verify dehydrator or oven temperature
- Cross-contamination: Keep drying equipment and surfaces clean
- Hand washing: Practice good hygiene when handling before and after drying
- Identification certainty: Only dehydrate mushrooms you can positively identify as true morels
Storage Safety
Monitoring for spoilage:
- Regular inspection: Check dried morels occasionally for signs of moisture or mold
- Smell test: Dried morels should retain a pleasant, earthy aroma
- Rotation practice: Use oldest dried morels first (first in, first out)
- When in doubt: Discard any dried morels that show questionable appearance, smell, or taste
- Contamination response: If one container shows issues, inspect all containers stored nearby
Conclusion: Enjoying Your Dehydrated Morels Year-Round
Mastering how to dehydrate morel mushrooms allows you to transform a brief seasonal delicacy into a year-round culinary treasure. The process preserves not only the distinctive flavor of morels but actually enhances it, creating a versatile ingredient that adds depth and character to countless dishes.
By following the guidelines in this simple guide, you can successfully dehydrate, store, and rehydrate morel mushrooms, extending their usefulness far beyond their short growing season. Whether you're preserving a successful foraging haul or taking advantage of a market special, proper dehydration ensures these prized fungi won't go to waste.
The modest effort required to dehydrate morels properly pays magnificent dividends in the kitchen throughout the year, allowing you to enjoy their unique flavor even when fresh specimens are nowhere to be found. From special occasion risottos to everyday soups, dried morels bring a touch of woodland luxury to your table any time you choose.
Share:
How to Grow Morel Mushrooms at Home Easily
How to Keep Morel Mushrooms Fresh and Flavorful